Showing posts with label Free Patterns. Show all posts

Friday, October 7, 2022

Mom's Hug Shrug

 It's Free Pattern Friday! This time it's a crochet pattern, designed by yours truly! This one is truly simple, as I am a beginner at crochet, but it's as warm and comforting as a mother's hug!

I used K&C Element yarn (which is discontinued), but any worsted weight will be fine. I used a size H crochet hook, and size 6 circular (or dpn) knitting needles. I used 4 balls of yarn or about 400 yds

So, starting with the crochet hook, chain enough stitches to be about 20" long. Exact count doesn't matter, so long as it's an even number. Hdc in each chain across for the first row. This piece will be worked back and forth as a big rectangle.

For the second row: (hdc twice in the same st, then skip one st) - repeat across
Third row: (skip one st, then hdc twice in the same st) - repeat across

Repeat these two rows until you have a long rectangle.  Measure it on yourself by holding it across your back between your hands, and keep going until it reaches just short of from wrist to wrist.

Once it's the length you want, sew the long sides together to make the sleeves, leaving a gap in the middle for your torso. (I left the yarn connected and used slip stitch to make the seams, but you could also cut the yarn and use a yarn needle if you wanted.)

Now, using the knitting needle, pick up about 36 sts from the wrist edge. Exact number doesn't matter as long as its an even number and evenly spaced around. Join in the round and work k2p2 ribbing for about 10 rows. Cast off all sts, and repeat to make the cuff on the other side.

Weave in any ends and enjoy your snuggly shrug!


Friday, May 20, 2022

Luxury Lace Indeed

It's Free Pattern Friday! 

This time I have a knitting pattern for you, designed by yours truly!

My local yarn shop has a clearance bin where all the single skeins of discontinued yarns end up. I found two hanks of Neighborhood Fiber Co. Capital Luxury Lace in that bin. Luxury is the word for this yarn for sure. It's a blend of merino wool, cashmere, and silk. It's deliciously soft and warm and dyed in beautiful rich colors.

Having only two not matching hanks, I had to get creative with what I made from it. I've always loved the look of bright fabrics peeking through an over layer of lace, so I took that idea and ran with it.

You can find the full downloadable pdf pattern here: 

https://www.ravelry.com/patterns/library/elderwood


Friday, April 15, 2022

Borders Abound

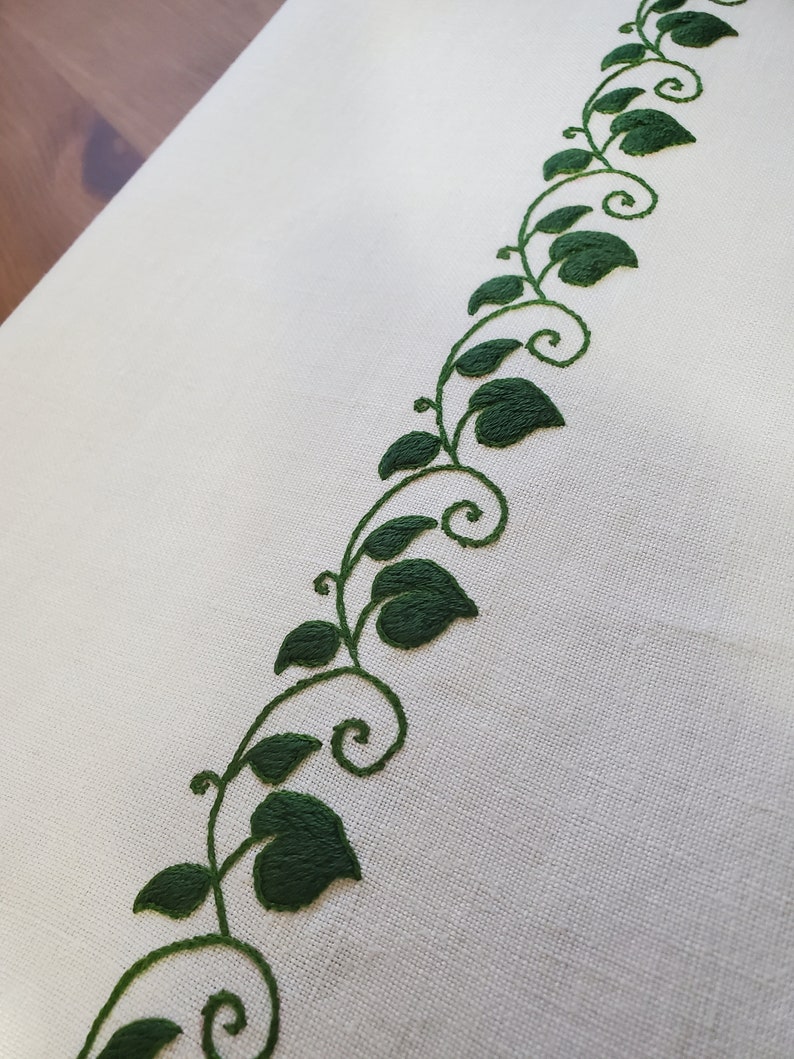
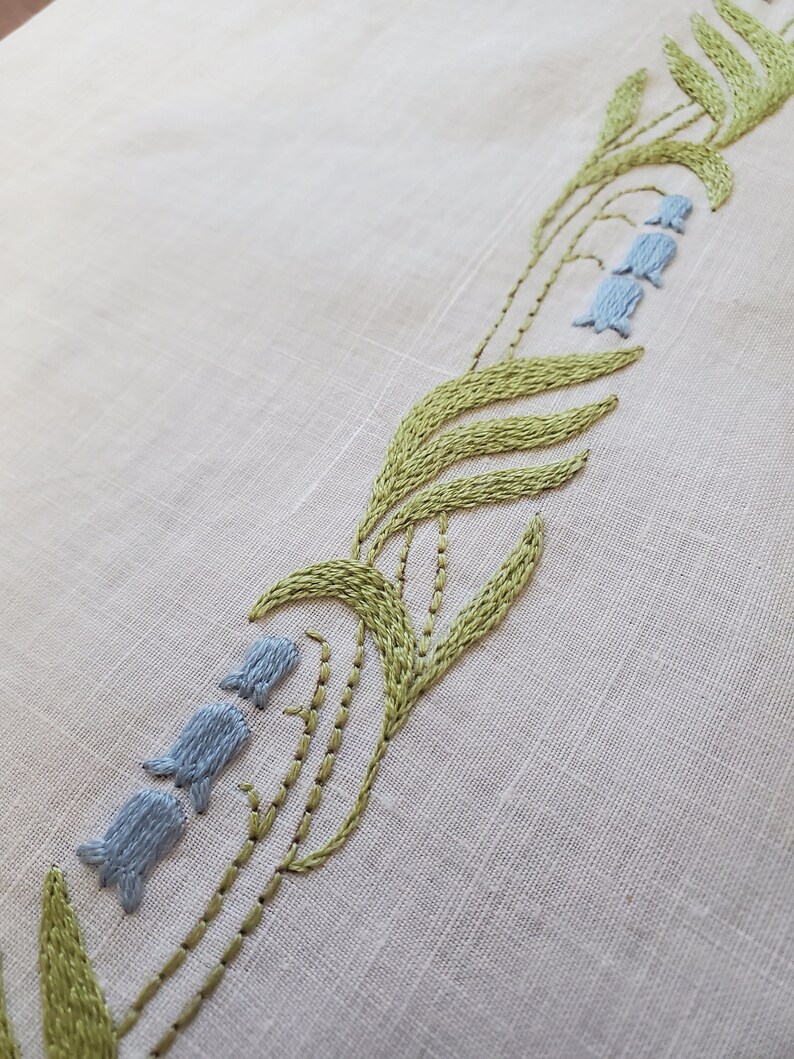
 It's free pattern friday! This time it's a trio of fantastic border designs, and a bit of stitching inspiration. These patterns are also great for drawing, painting, or whatever your craft of choice. Enjoy!


Friday, March 11, 2022

Tracing Tribulations

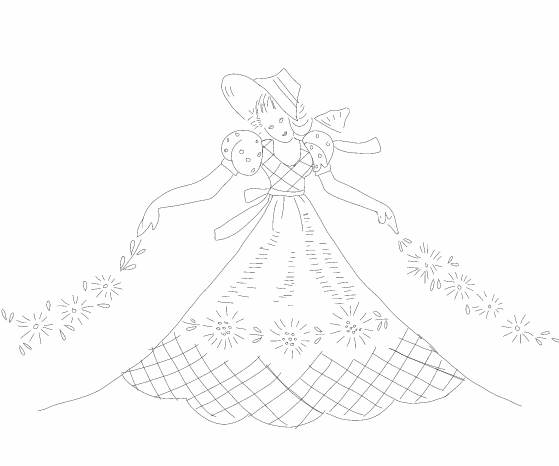
 It's friday and that means it's time for free patterns! Unfortunately the app I used to use for tracing is no longer supported so I was forced to find another. With all the app downloading and testing, I only got one tracing done. I hope to have more ready for you next time, but for now, enjoy this delightful design from a vintage bread cloth.


Friday, February 4, 2022

Free Pattern Collection IV

 Here's a handful of cheery tracings from linens, ceramics, and more. Great for coloring, embroidery, or whatever craft suits your mood. Enjoy!


Friday, December 31, 2021

Simple(ly) Awesome Shirt to Sew

It's Free Pattern Friday time, just in time for the new year! Start 2022 off right with this quick sewing project that is very beginner friendly :)


This pattern was adapted from a version of a traditional Rumanian garment. The original was knee length with slightly narrower pleated sleeves and counted embroidery on the collar, front and sleeves.

For my version I was a bit limited by the fabric I chose, but also wanted a shorter shirt instead of a knee length tunic. I also took the taper out of the sleeves and gathered them at the cuff instead of pleating, to give a bit softer and fuller look. I took in the width of the body as well since the original size would have been enormous on me.


The fabric I chose was a thrift store tablecloth I found for 2$. It’s a lovely soft cotton in pale yellow, with beautiful hand embroidery and cutwork designs in grey. The tablecloth measured 46” by 62” with hand rolled edges.


The first step was to draft the full sized pattern pieces from my diagram. I used a 30” wide roll of white craft paper, but tissue will work fine as well. Since almost all of the pattern pieces are straight lines and rectangles, drafting them on the paper is easy. All you really need is a square ruler or yardstick. For the one curved line (the armhole) I traced the back piece from another blouse pattern. You could also use a curved ruler.

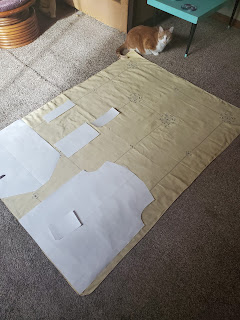
After drafting my pattern pieces on paper, I carefully laid them out on the tablecloth to ensure I had enough material and to see how best to arrange the pieces to make the most of the embroidery. As you can see from the picture of the pieces laid out, there is quite a bit of material left over. I arranged the pieces based on where I wanted the embroidery, not the most efficient use of fabric. This size tablecloth can make a larger shirt than mine easily if placement is done well.

Next came carefully cutting the pieces out. I aligned the shirt pieces so that I could use the rolled edge of the tablecloth and not have to hem up the bottom. I chose not to use interfacing in the collar and cuffs because I didn’t want it to show through the cutwork. I carefully cut the slits on the front and facing and marked the ends of the slits for the sleeves and side seams. 

My Chief Inspection Officer diligently holding down the corner of my fabric as I lay out my pattern pieces

All the pieces cut, from left to right: Front and Back, Neck Facing, Shoulders, Collar, Cuffs, and Sleeves at top right

So after the cutting was done, sewing was next:
  1. Sew the facing to the front, turning a sharp V shape at the bottom of the slit. Clip a notch in the seam allowance at the center of that V, almost to the stitching. Turn the facing inside and press.

  2. Sew the shoulder pieces to the front, press the seams open.

  3. Sew the shoulder pieces to the back, press the seams open.

  4. Sew the side seams, leaving a 4” slit open at the bottom. Press the seams open and topstitch around the slits.

  5. Sew the two collar pieces together along the short edges and one long edge. Clip the seam allowance at the corners. Turn and press. Press under seam allowance on the inside edge of the open side.

  6. Sew the collar onto the neck edge, careful to keep the facing and front together. Press the seam allowance up into the collar. Hand stitch the inside edge of the collar in place.

  7. Sew the sleeve seams, leaving a 3” slit at the wrist. Press the seams open and topstitch around the slits.

  8. Use a basting stitch to gather the wrist to the length of the cuff.

  9. Fold each cuff in half and sew the short sides. Clip the seam allowance at the corners. Turn and press. Press under seam allowance on the inside edge of the open side.

  10. Sew the cuff to the gathered wrist edge. Press the seam allowance up into the cuff. Hand stitch the inside edge of the cuff in place.

  11. Sew the sleeve into the armhole, carefully matching the straight edge at the top of the sleeve cap with the shoulder pieces on the body. Sew another line just inside the seam allowance at the underarms to reinforce.

  12. Add buttonholes and buttons to cuffs as desired.


Notes:

 I used a ⅜” seam allowance throughout. Mostly this was to make it easier to get the embroidery where I wanted on the garment, less of it was lost into the seams.

The pattern pieces in the diagram DO NOT have seam allowance included in their measurements. This is by design, so that you can add however much seam allowance you desire. Either add it in when drafting full size, or when cutting.

I made the buttonholes on the cuffs by hand, using the embroidery as a guide. I also didn’t add buttons as I wanted to use cufflinks. This is purely personal preference.

I resized the original garment to me by measuring myself. The widest part of my body is 40” around, so the body of the shirt had to be at least that. I measured across the back of a neckband on a shirt I like and got 6”, thus the width at the center neck of the shirt became 6”. This pattern is supposed to be loose, and the armholes and shoulders are boxy and generous. Still, it would not be hard to size those up or down by adjusting the shoulder pieces and depth of the armhole curve. If you have enough fabric and want the original knee length look, go for it! Just make the shirt pieces longer. Make the cuffs wider if you want, or the collar. These pattern pieces are pretty simple, so feel free to customize them into your perfect shirt.


It looks pretty great belted too!


Wednesday, October 16, 2019

Free Pattern Collection III

Here's the past few weeks' free pattern tracings collected together for your convenience, Enjoy!


Wednesday, April 3, 2019

Free Pattern Collection II

Here's the past few weeks' free pattern tracings collected together for your convenience, Enjoy!


Friday, May 25, 2018

Free Pattern Friday! 05-25-2018

Surprise, surprise!  This week's free pattern isn't a tracing, it's a translation!  Take a gander below for my Google assisted translation of one of the projects from the Schoeller Wolle/Esslinger Wolle pamphlets.  Also pictured is a scan of the original instructions in German.  Any German readers, please let me know if I got anything wrong!


Schoeller Wolle/Esslinger Wolle Pamphlet – #2231 Cross Knitted Bolero – Translated from original German

Size: 36/38
Bust of the Model: about 92 cm
Total Length: 43cm

Materials: SCHOELLER Wool “Carmen” 450g Black, ESSLINGER Wool “Gold and Silver” 200g Black, One pair INOX Tric needles size 4.5 and 5mm, and One INOX circular needle size 4mm 120cm long.

Use two strands of “Gold and Silver”

Stockinette Stitch: RS row knit, WS row purl
Stripe Sequence in St. St.: *5.5cm (about 12 rows) in “Carmen” using 5mm needle, 6 rows in “Gold and Silver” using 4.5mm needle* Repeat between *'s

Swatch test and change needles as necessary!
Gauge: 14sts by 30 rows = 10cm

Work: Using two strands of “Gold and Silver” cast on 48 sts with a 4.5 mm needle and work in K1, P1 for 2 cm. Begin stripe sequence.

Switch to “Carmen”, increase one stitch on each end of the 4th, 6th, and 8th rows, after 12 rows in “Carmen” switch to “Gold and Silver”. In the first row with “Gold and Silver” decrease 14 sts, distributed evenly.

Continue the stripe sequence, increasing and decreasing stitches as follows:
1st Stripe “Carmen”: increase 10 sts,
1st Stripe “Gold and Silver”: decrease 5 sts,
2nd Stripe “Carmen”: increase 10 sts,
2nd Stripe “Gold and Silver”: decrease 5 sts,
3rd Stripe “Carmen”: increase 14 sts,
3rd Stripe “Gold and Silver”: decrease 9 sts,
4th Stripe “Carmen”: inrease 17 sts
4th Stripe “Gold and Silver”: decrease 12 sts,
5th Stripe “Carmen”: inrease 19 sts
5th Stripe “Gold and Silver”: decrease 14 sts,
6th Stripe “Carmen”: inrease 21 sts
6th Stripe “Gold and Silver”: decrease 19 sts,
7th Stripe “Carmen”: inrease 24 sts
7th Stripe “Gold and Silver”: decrease 19 sts,
8th Stripe “Carmen”: inrease 24 sts
8th Stripe “Gold and Silver”: decrease 19 sts,

Simultaneously:
In the 2nd through 6th stripes in “Carmen” increase 1 on each end in the 4th, 6th, and 8th rows.
In the 7th stripe in “Carmen” increase 1 st on each end of the 4th and 6th rows.

After the 8th “Gold and Silver” stripe divide the work for the neckline and continue to work both parts separately. (57 sts each side):
Still using “Gold and Silver” cast off 1x2 and 1x1 sts at the center. Increase 10 sts distributed evenly, then repeat the cast off again.

The 9th stripe in “Gold in Silver” is the center back!

Finish the piece in “Carmen”; for the neckline on the left side work every other row 8x4 sts decreased. For the rounding at the right side of the piece, on the 3rd row in “Carmen” cast off every other row 2x1, 3x2, and 3x3 sts, then cast off remaining 8 sts.

Work the other half of the bolero as above, reversing neckline shaping.

Completion:
Close seams. With circular needle and 2 strands of “Gold and Silver” pick up 286 sts along the front, bottom, and neckline edges (lower back edge 78sts, front pieces 172 sts each, back neckline 36 sts). Work in K1, P1 for 2.5 cm, cast off in pattern.


My Notes: Hoo-boy, this one is a doosy...
I am not sure if it is because of how German knitting patterns are written, or because this pattern was crammed onto a small pamphlet, but it's a bit sparse. Specific stitches are not given for increasing or decreasing, and how many stitches to add or subtract and when is at best stated as “increase this many in this row, distributed evenly.”

The bold and exclamations are all straight from the pattern. They were among the easiest things to figure out. This one was a lot tougher to decipher than the Dutch pattern, as there were more abbreviations and no key as to what they meant. Google and some German speaking friends helped me out with words, but they aren't knitters, so I made the best sense of it that I could. Perhaps if I give a try at knitting this pattern I will write it out with a little more detail. There is a lot going on at once in this pattern, and it's not immediately intuitive with the scant instructions.

The bit about the 9th stripe of “Gold and Silver” being the center back especially confused me, as I don't think there is a 9th stripe. You finish each half of the bolero with “Carmen” after the 8th stripe, and then sew the halves together. Maybe they just mean where the 9th stripe would be if there was one? Also, where the neckline begins the pattern clearly says “after the 8th 'Gold and Silver' stripe”, but then also clearly says to do the next bit in 'Gold and Silver'. Is this stripe wider than the others then? Or is it meant to be done before the end of the stripe?

I wrote the pattern above as it is in the pamphlet, but I want to add what I believe is going on in the stripe sequence just based on the diagram given and my own knitting experience. While it seems from the text like there are 9 of each stripe (set up plus 8 more) I think the setup is meant to happen in the first stripe. The diagram only shows 8 stripes. I believe the increases and decreases in each stripe are supposed to happen in the first row of each stripe, and the other increases and decreases (stated at the very start and under 'simultaneously') are additional to those. As I have not knit this yet, I cannot say for sure, but that is my best guess at how to reconcile the text and the diagram.

As for the yarn...surprise, surprise, neither are produced anymore. I looked on the internet and found no trace of “Carmen”, but it appears to be some sort of boucle or other fluffy yarn to make that poofy appearance in stockinette stitch. “Gold and Silver” I was able to find a bit about. It is a rayon/lurex metallic yarn that looks about sock or lace weight. Best advice, find whatever yarn suits your tastes and then find needles to get the right gauge.


Wednesday, May 9, 2018

Free Pattern Collection I

The last few week's worth of tracings all gathered together for your convenience, enjoy!


Friday, March 23, 2018

Free Pattern Friday! 02-23-2018


A lovely bouquet to celebrate the start of spring!  This was traced from a vintage plate.  Enjoy!

Friday, December 29, 2017

Free Pattern Friday! - 12-29-2017

Free Pattern Friday!
This lovely was traced from a cheery print on a scarf.  It was but one of many cute designs, but it sang to me the loudest.  From my heart to yours, best wishes for the new year!


Friday, December 15, 2017

Free Pattern Friday! 12-15-2017

Surprise, surprise!  This week's free pattern isn't a tracing, it's a translation!  Take a gander below for my Google assisted translation of the cover project from the Dutch knitting book Bee Bee Toppers.  Also pictured is a scan of the original instructions and abbreviations in Dutch.  Any Dutch readers, please let me know if I got anything wrong!


Probably obvious, but it took me a bit to realize the
numbers in the diagrams are cm and not number
of stitches/rows.  Also, the top picture, the right side
is the back piece, and the left side is the front.  The three
stars indicate this pattern is more advanced and not for
beginning knitters.  Granted, I am not a beginner, but
now that I can read the pattern, it does not seem all
that difficult.
Sizes: Small, Medium, and Large: 82-86, 90-94, 98-102cm in width.
Materials: 1200-1400 grams of medium weight wool yarn, size 6 needles (see My Notes below)
Gauge: With two strands of wool on size 6 needles: 9 stitches = 10cm wide.
Woolmeter: Letter E  (see My Notes below)
Used Stitches: 
    Garter Stitch: knit all rows
    Pattern Stitch (worked over an even number of stitches):
         1st Row: Purl
         2nd Row: Knit
         3rd Row: Knit
         4th Row: Purl
         5th Row: K1 *K1, with the right needle, pick up the purl bump directly below the next stitch (3 rows below) and place it on the left needle. Slip the right needle through the back of that loop and the next stitch and knit together* repeat to last stitch in the row, K1.
        6th Row: Knit
        7th Row: Knit
        8th Row: Purl
        9th Row: K1 *with the right needle, pick up the purl bump directly below the next stitch (3 rows below) and place it on the left needle. Slip the right needle through the back of that loop and the next stitch and knit together. K1* repeat to last stitch in the row, K1.
        Repeat 2nd to 9th row for pattern.

The numbers for the three sizes are given in succession. Where only one number is given, that number is for all three sizes. Jacket is worked with two strands of yarn.

Back: Cast on 47-51-55 stitches and work 6 rows in garter stitch. Then work * 14cm of pattern stitch, 8 rows of garter stitch. Repeat from * until after 3rd pattern stitch section. Work 8 rows in garter stitch. For the armholes: cast off 6 stitches from each side. Continue in patttern stitch until the garment measures 20-21-22 cm from the start of the armholes. Cast off remaining stitches.

Front Pockets: Cast on 14 stitches. Work 14cm of pattern stitch.  Break yarn and place all stitches on a spare needle. Repeat for second pocket.

Front: Cast on 26-28-30 stitches. For each front piece, work as on the back until the first garter stitch section. Work 4-5-6 stitches from the side seam, slip the next 14 stitches onto a stitch holder or spare yarn. Next row, work across, knitting from the pocket piece instead of the 14 stitches on the holder or spare yarn. Continue front until after 3rd pattern stitch section. Work 8 rows in garter stitch. Shape armholes as for the back. Work in pattern stitch until the garment measures 17-18-19 cm from the start of the armholes. For the neck shaping, cast off 4 stitches from the front edge. Work one row, then cast off two stitches from the front edge. Cast off 1 stitch from the front edge three times. Cast off the remaining 11-13-15 stitches. Work the 2nd front in mirror image.

Sleeves: Cast on 32-34-36 stitches. Work 20 rows in garter stitch. Continue as on back, ie. 14cm pattern stitch, 8 rows garter stitch. After the second garter stitch section (excluding cuff) cast off 1 stitch on each side on each row until the sleeve is 12-13-14 cm from the start of the armhole. Cast off remaining stitches. Work second sleeve the same.

Hood: Cast on 52 stitches and work 28cm in garter stitch. Cast off the center 6 stitches and work each remaining half (23 stitches) separately. For each side, cast off 6 stitches at the center edge three times. Cast off the remaining stitches.

Finishing: Sew the shoulder seams, sew the sleeves to the shoulders, sew side and sleeve seams. Close the top of the hood, sew the hood in the neck. Slip each set of pocket stitches from the holders/spare yarn to a needle and work 7 rows in garter stitch. Cast off. Sew pockets and edges to front pieces. Pick up stitches along front and hood (about 8 ½ stitches per 10cm) and work 5 rows in garter stitch. Cast off. Crochet or twist a cord and weave through the hood.

--

My Notes On This Pattern:
As far as yarn and needles for this pattern: I measured Red Heart Super Saver worsted on the Woolmeter, and it is one size too small. Bernat Sheep(ish) is a closer fit, but still a bit small. Knitting a test patch with the Sheep(ish) I got about 7cm wide over 9 stitches on U.S. size 6 needles. I didn't see any indication in the pattern for what system of needle measurement is used, so I am not 100% certain which size they really mean: a U.K./European size 6 needle is a U.S. size 8 needle, A 6mm diameter needle is a U.S. size 10 needle. I recommend finding a yarn you like, and knitting test swatches with various sized needles until you get the correct gauge.

Google Translate did most of the work, but some of it I did need to try and knit to figure out. Many of the Dutch knitting terms and abbreviations are different than English ones, and so some of it is not a literal translation of the text. I separated out the pocket pieces from the section on the front pieces, because it just seemed to make more sense to make the pockets first rather than stop in the middle of the front piece to do it.  I have not yet knit this project, so if you do, please let me know if there are any glaring errors in the pattern. 

The pattern stitch was especially tricky to figure out. In the end, I just took some spare yarn and knitted up what I thought the text was telling me to do. It is actually a lot easier than it sounds. Similarly with the pockets. The process is hard to describe in words. There are a lot of great knitting instruction videos available, you can find a few on this pocket technique here.